How I make PCBs for my Prototypes

In this article I want to explain how I make PCBs for my projects.

As you can see on my articles and YouTube channel, if I build something, I always want to have the best result. Before I started to order my PCBs at a PCB Manufacturer, I etched my PCBs myself and I used many different PCB making techniques. From the toner transfer to photo positive layer technique.

At some point I was intrigued to try to order PCBs for my prototypes from a PCB Manufacturer and hoping that they look better. After researching in internet, I stumbled upon a company named JLCPCB. Here is the link: https://jlcpcb.com/DDE. We can order up to 4-layer PCBs for as low as $2 and they also offer free-SMT-assembly for us.

So I ordered small quantity PCBs and after around 2 weeks the arrived. I was surprised to see the quality of the product. They are awesome!

To draw the PCBs I use PCB designer software KiCAD. KiCAD is an open-source circuit and PCB designing software. You can export your project on KiCAD and upload the files to JLCPCB website to order your PCB. Here is the link to the KiCAD website: https://www.kicad.org/

Here are some of my PCBs from JLCPCB:

They look professional don’t they?

Install Nvidia Graphic Card on LMDE3 LTSP Fat-Client

CBD gummies have gained popularity as a natural remedy for pain relief, offering an alternative to traditional pharmaceuticals. But the burning question remains: How long does it take for CBD gummies for pain?

Introduction to CBD Gummies for Pain Relief
CBD, short for cannabidiol, is a compound derived from the cannabis plant known for its potential therapeutic effects. When infused into gummies, it becomes an easily consumable and palatable form. The appeal of CBD gummies lies in their potential to alleviate various types of pain, including chronic and acute discomforts.

Factors Influencing CBD Gummies’ Effectiveness
Several factors play a crucial role in determining how quickly CBD gummies might alleviate pain. The concentration of CBD in the gummies, individual body metabolism, and the type and severity of pain experienced all contribute to the overall effectiveness.

Onset Time: Understanding How CBD Works in Gummies
The process begins once you consume the gummies. The CBD is absorbed into the bloodstream through the digestive system. However, the onset time can vary significantly based on the individual’s metabolism and how their body responds to CBD.

Variances in Effectiveness Based on Dosage and Quality
The dosage of CBD gummies is another factor affecting onset time. Higher doses may lead to faster effects, but it’s essential to find the optimal dosage that suits individual needs. Moreover, the quality of CBD products matters significantly, influencing both onset time and overall efficacy.

Realistic Expectations and Managing Them
It’s important to manage expectations regarding the timeframe for experiencing relief. While some may feel the effects within an hour, others might take longer. Understanding this variability can prevent disappointment and encourage a more patient approach.

Tips for Enhancing CBD Gummies’ Efficacy
Optimizing the effectiveness of CBD gummies involves various factors, including the consumption method and lifestyle choices. Ensuring a healthy lifestyle, along with proper consumption techniques, can enhance the gummies’ pain-relieving potential.

Safety and Precautions
Though generally well-tolerated, CBD gummies may have side effects like dry mouth, diarrhea, or changes in appetite. It’s advisable to consult a healthcare professional before using them, especially for individuals with existing medical conditions or those taking other medications.

User Testimonials and Experiences
Real experiences can provide valuable insights into the effectiveness of CBD gummies for pain relief. Users’ testimonials often highlight different onset times and overall experiences, aiding in understanding the product’s variability.

LTSP Fat-Client on LMDE 3

Can this remedy be combined with other weight loss methods or supplements

In the quest for effective weight loss solutions, individuals often contemplate combining remedies with other methods or supplements to optimize results. This approach seeks to leverage the potential synergy between various techniques, aiming for enhanced efficacy in shedding excess weight.

Combining remedies with other weight loss methods can indeed offer a holistic approach toward achieving fitness goals. The idea is not about relying solely on one method but rather understanding how different strategies can complement each other for better outcomes.

The Synergy between Remedies and Weight Loss Methods
When exploring the amalgamation of remedies with existing weight loss methods, it becomes apparent that each approach can play a significant role. Remedies, which could range from natural herbal supplements to specific dietary adjustments, often focus on enhancing metabolism, suppressing appetite, or aiding digestion.

Integrating these remedies with established weight loss methods such as exercise routines, balanced diets, or medical prescriptions can create a comprehensive regimen. This combination tends to target different aspects of weight loss simultaneously, potentially yielding more substantial and sustainable results.

Compatibility Check: Assessing the Interactions
However, it’s essential to approach this combination cautiously. Compatibility between remedies and supplements is crucial to ensure safety and avoid adverse reactions. Consulting healthcare professionals or nutritionists before embarking on such combinations is highly recommended to mitigate potential risks.

Benefits of Combining Remedies with Other Methods
The benefits of combining remedies with other methods are multifaceted. By synergizing various approaches, individuals might experience accelerated weight loss, improved metabolic functions, better appetite control, and overall enhanced well-being.

Cautionary Notes: Potential Risks and Considerations
Despite the potential benefits, there are inherent risks when combining remedies and supplements. Interactions between different substances might lead to unexpected side effects or hinder the efficacy of individual components.

Expert Opinions: Insights from Professionals
Experts often advise a cautious yet informed approach when combining remedies and supplements. They emphasize the importance of understanding individual body responses, potential interactions, and the need for professional guidance.

Success Stories: Real-Life Experiences
Numerous success stories testify to the effectiveness of combining remedies with other weight loss methods. These experiences highlight the personalized nature of such combinations and the importance of finding the right balance.

I know this is maybe too late to write an article for LMDE 3. But this is what I currently use at my office. I made this setup more than 2 years ago. It took me a week to figure out the problem I had regarding LTSP-Server installation and configuration. Until now I didn’t have time to document it. I followed the instructions mainly from here. At our office we have 5 thin clients and one LTSP-Server. The configuration looks like this:

Sketch of LTSP at my office

Anyway, here are the steps that I did to install LTSP-Server at my office:

~$ sudo apt-get update
~$ sudo apt-get install ltsp-server-standalone dnsmasq epoptes epoptes-client ltsp-client network-manager-gnome dnsutils rsync

Add user to group “epoptes”, in this example “admin”:

~$ sudo usermod -G epoptes -a admin

Set the network like following screenshot:

Network settings

My “/etc/ltsp/dhcp.conf” looks like following:

#
# Default LTSP dhcpd.conf config file.
#

authoritative;

subnet 192.168.68.0 netmask 255.255.255.0 {
    range 192.168.68.20 192.168.68.250;
    option domain-name "example.com";
    option domain-name-servers 192.168.68.1;
    option broadcast-address 192.168.68.255;
    option routers 192.168.68.1;
    next-server 192.168.68.1;
#    get-lease-hostnames true;
    option subnet-mask 255.255.255.0;
    option root-path "/opt/ltsp/i386";
    if substring( option vendor-class-identifier, 0, 9 ) = "PXEClient" {
        filename "/ltsp/i386/pxelinux.0";
    } else {
        filename "/ltsp/i386/nbi.img";
    }
}

Restart network-manager service:

~$ sudo systemctl restart network-manager.service

Find out kernel version and reconfigure the package:

~$ uname -r
4.9.0-8-amd64
~$ sudo dpkg-reconfigure linux-image-4.9.0-8-amd64

Update ltsp-image:

~$ sudo ltsp-update-image --cleanup /

Here are some pictures of the client during booting:

ltsp client boot 1
ltsp client boot 2
ltsp client boot 3
ltsp client boot 4
ltsp client boot 5
ltsp client boot 6

Okay, that’s it about my LMDE 3 LTSP-Server installation.

Interrupter Circuit

Here is the interrupter circuit that I use on some of my plasma ignition videos. I also call this circuit “ignition coil igniter”. It consists of a frequency generator and two switching MOSFETs. 555 timer IC is utilized to generate pulses. The frequency can be adjusted by turning the potentiometer. This circuit can drive two ignition coils at the same time. I designed this circuit this way because I want to be able to make comparison between two ignition setups and see the result side-by-side.

What is the Most Effective Urine Drug Test?

Urine drug tests are a common method used to detect the presence of various substances in a person’s system. They are widely employed in various settings, including workplaces, healthcare facilities, and legal situations. Understanding the effectiveness of urine drug tests is crucial for ensuring accurate results and making informed decisions.

Types of Urine Drug Tests

There are primarily two types of urine drug tests: instant tests and laboratory tests. Instant tests provide quick results but may have lower accuracy compared to laboratory tests, which involve more thorough analysis.

Effectiveness of Urine Drug Tests

The effectiveness of urine drug test depends on several factors, including sensitivity, specificity, and detection windows. Sensitivity refers to the test’s ability to correctly identify the presence of a substance, while specificity indicates its ability to accurately rule out the presence of a substance. Detection windows vary depending on the drug being tested and can range from a few hours to several days.

Factors Affecting Test Accuracy

Several factors can influence the accuracy of urine drug tests, including the frequency of drug use, metabolism rate, type of drug, and testing method. Individuals who use drugs frequently may have higher concentrations of substances in their urine, making them easier to detect. Metabolism rate can also affect how quickly drugs are eliminated from the body, potentially impacting test results.

Most Effective Urine Drug Test

The most effective urine drug test is one that balances accuracy with practicality. While laboratory tests tend to offer higher accuracy, instant tests are often more convenient and cost-effective. Choosing the right test depends on various factors, including the individual’s circumstances and the purpose of the testing.

Advantages and Disadvantages

Urine drug testing has several advantages, including its non-invasive nature and the ability to detect a wide range of substances. However, it also has limitations, such as the potential for false positives and the inability to detect recent drug use.

Choosing the Right Test

When selecting a urine drug test, it’s essential to consider factors such as the individual’s drug use history and the reason for testing. For example, someone undergoing routine workplace testing may opt for a less invasive instant test, while a clinical setting may require more comprehensive laboratory testing.

Commonly Tested Substances

Urine drug tests can detect various substances, including marijuana, cocaine, opiates, and amphetamines. Each drug has its detection window, which can influence the timing of testing.

Accuracy in Different Situations

The accuracy of urine drug tests can vary depending on the setting. Workplace drug testing, for example, may have different requirements than testing in clinical settings. Understanding these differences is essential for interpreting test results accurately.

Here is the schematic:

Interrupter Schematic Diagram

Before I drew the schematic, I tested various combinations on a breadboard. I use KiCAD to draw the schematic and also the PCB. On the final version I use IRF740 instead of IRF540. This type of MOSFET can handle higher voltage compare to the previous one.

Here is my home made PCB:

PCB bottom view
PCB top view

After the prototype was successfully built, I ordered the PCB from jlcpcb.com. Also Kaizen Technology offers services like Surface Mount Assembly, Prototype PCB Assembly, and Fast turn PCB Assembly.

Here is how it looks like:

PCB bottom view
PCB top view

That was the story of my ignition coil interrupter.

Installing Printer Brother LH-L2360DN on LinuxMint LMDE2

I just installed a new printer on my old LMDE2 server and realized that we cannot install that printer by just installing the driver from Brother support website. If we install only the cupsndiswrapper, it will install the driver and we can add a new printer but we cannot print anything. We have to install the driver using Brother Utility program. BTW, I found a good documentation here.

Basically what I did was following:

1. Download the driver install tool from here. Just click on “Agree on the EULA and Download”.

2. Create a new folder for extraction:

mkdir hl2360dn_driver

3. Change directory to the newly created folder:

cd hl2360dn_driver

4. Move the downloaded file here:

mv ../linux-brprinter-installer-2.2.2-1.gz .

5. Extract the downloaded file:

gunzip linux-brprinter-installer-2.2.2-1.gz

6. Run the installer:

sudo ./linux-brprinter-installer-2.2.2-1

7. The installer will ask you about the device model, type in “hll2360dn”.

8. Follow the installation until you are asked about the device URI, for this I answered with ‘n’ for no because I use USB connection.

9. That’s it! Now you can add a new printer from “Printer Configuration”.

Installing Guacamole on Raspberry Pi

Guacamole is a clientless remote desktop gateway. After successful implementation of this system on some PCs, now I want to use this on a Raspberry Pi 3 B+. Following is how I do the installation on Raspbian system.

OS Version: Raspbian GNU/Linux 9 (stretch)
  1. Upgrade the system:
$ sudo apt-get update
$ sudo apt-get upgrade
  1. Install the required dependencies:
$ sudo apt-get install libcairo2-dev
$ sudo apt-get install libjpeg62-turbo-dev
$ sudo apt-get install libpng12-dev
$ sudo apt-get install libossp-uuid-dev
  1. Install the optional packages:
$ sudo apt-get install libavcodec-dev libavutil-dev libswscale-dev
$ sudo apt-get install libpango1.0-dev
$ sudo apt-get install libssh2-1-dev
$ sudo apt-get install libtelnet-dev
$ sudo apt-get install libvncserver-dev
$ sudo apt-get install libpulse-dev
$ sudo apt-get install libssl-dev
$ sudo apt-get install libvorbis-dev
$ sudo apt-get install libwebp-dev
  1. Download Guacamole Server and Client packages:
$ wget http://sourceforge.net/projects/guacamole/files/current/source/guacamole-server-0.9.14.tar.gz
$ wget http://sourceforge.net/projects/guacamole/files/current/source/guacamole-client-0.9.14.tar.gz
  1. Build and install the server:
$ tar xzf guacamole-server-0.9.14.tar.gz
$ cd guacamole-server-0.9.14
$ ./configure --with-init-dir=/etc/init.d
$ make
$ sudo make install
$ sudo update-rc.d guacd defaults
$ sudo ldconfig
  1. Build the client:
$ sudo apt-get install maven
$ tar xzf guacamole-client-0.9.14.tar.gz
$ cd guacamole-client-0.9.14
$ mvn package
  1. Install jetty9 servlet container:
$ sudo apt-get install jetty9
  1. Deploy Guacamole:
$ sudo cp guacamole/target/guacamole-0.9.14.war /var/lib/jetty9/webapps/guacamole.war
$ sudo mkdir -p /etc/guacamole/extensions
$ sudo cp extensions/guacamole-auth-noauth/target/guacamole-auth-noauth-0.9.14.jar /etc/guacamole/extensions/.
  1. Copy following text and save it as “/etc/guacamole/guacamole.properties”
#    Guacamole - Clientless Remote Desktop
#    Copyright (C) 2010  Michael Jumper
#
#    This program is free software: you can redistribute it and/or modify
#    it under the terms of the GNU Affero General Public License as published by
#    the Free Software Foundation, either version 3 of the License, or
#    (at your option) any later version.
#
#    This program is distributed in the hope that it will be useful,
#    but WITHOUT ANY WARRANTY; without even the implied warranty of
#    MERCHANTABILITY or FITNESS FOR A PARTICULAR PURPOSE.  See the
#    GNU Affero General Public License for more details.
#
#    You should have received a copy of the GNU Affero General Public License
#    along with this program.  If not, see <http://www.gnu.org/licenses/>.

# Hostname and port of guacamole proxy
guacd-hostname: localhost
guacd-port:     4822

# Auth provider class (authenticates user/pass combination, needed if using the provided login screen)
auth-provider: net.sourceforge.guacamole.net.basic.BasicFileAuthenticationProvider
basic-user-mapping: /etc/guacamole/user-mapping.xml

# NoAuth properties
noauth-config: /etc/guacamole/noauth-config.xml
  1. Copy following text and save it as “/etc/guacamole/noauth-config.xml”
<configs>
    <config name="pi" protocol="vnc">
        <param name="hostname" value="localhost" />
        <param name="port" value="5900" />
    </config>
</configs>
  1. Copy following text and save it as “/etc/guacamole/user-mapping.xml”. The password is “raspberry”.
<user-mapping>
    <authorize 
    username="pi"
    password="b89749505e144b564adfe3ea8fc394aa"
    encoding="md5">
        <connection name="pi">
        <protocol>vnc</protocol>
        <param name="hostname">localhost</param>
        <param name="port">5900</param>
        <param name="swap-red-blue">false</param>
        <param name="enable-audio">true</param>
        </connection>
    </authorize>
</user-mapping>
  1. Install x11vnc VNC-Server:
$ sudo apt-get install x11vnc
  1. Copy following text and save it as “~/.config/autostart/x11vnc.desktop”
[Desktop Entry]
Name=X11 VNC
Comment=Remotedesktop Server
Exec=x11vnc -forever -nopw -rfbport 5900 -display :0
Terminal=false
Type=Application
X-MATE-Autostart-enabled=true
Comment[de_DE]=Remotedesktop Server
  1. Restart Raspberry Pi:
$ sudo reboot

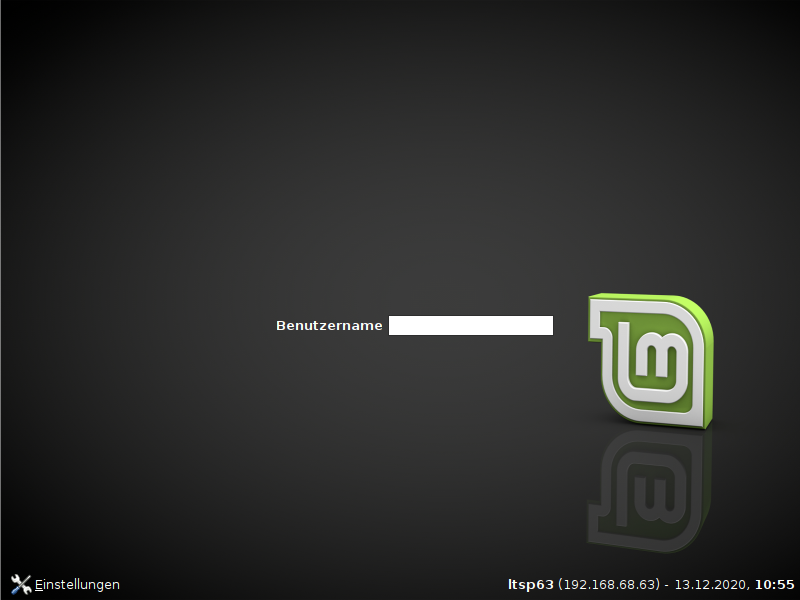
At this point guacamole should be automatically started at system boot. You can try to open it from a web-browser, the address is “<ip-address>:<port>/guacamole”. On my network it looks like this “192.168.178.100:8080/guacamole”.

In case you use headless system (Raspberry Pi without display attached) and you have poor display resolution, you can set the parameters in “/boot/config.txt” from this:

#framebuffer_width=1280
#framebuffer_height=720

#hdmi_force_hotplug=1

to this (for full HD resolution):

framebuffer_width=1920
framebuffer_height=1080

hdmi_force_hotplug=1

Restart the system and that’s it. Have fun!

HHO Cell – New Design

UPDATE: This project is now active for 6 days (until 8th of May 2018) on Kickstarter: https://www.kickstarter.com/projects/335524972/hydrogen-generator

I have been researching HHO technology in my spare time for about ten years now. Many different cells have been built, many different driving techniques have been tried (DC, AC, Pulsed and Resonant). Now I have some experience in this field.

My current cell

My current cell can produce around 10 LPM with input power around 3000 Watts. This cell is driven using rectified 230V AC.

Gas production

To improve the gas production, now I come up with this new design. My target is to build a HHO cell that can run a 1.6 liter car engine. The gas production should be at least 30 liter/minute.

New cell specification:

  • 320 neutral plates (material 1.4571/316Ti, thickness 1.5 mm)
  • 2 terminal plates (material 1.4571/316Ti, thickness 3.0 mm)
  • 6 gas output outlets (12 mm pneumatic hose)
  • 2 water inlets (12 mm pneumatic hose)
  • Manometer (4 Bar)
  • Pressure switch (adjustable, to avoid over pressure)

Following are the complete technical drawings of my new design (all measurements are in millimeter).

Neutral plate (320 pcs.)

Terminal plate (2 pcs.)

End plate POM-C (2 pcs.)

Gasket EPDM between metal plates (thickness 1 mm, 321 pcs.)

Gasket EPDM for end plates (thickness 1 mm, 2 pcs.)

The complete cell should look like this

I hope that I can build this cell as soon as possible.

Arduino Code for my Gyrocar Toy

After so many requests of my code of my Gyrocar Toy on my YouTube channel. I decided to post my code here. This code is very primitive as I want to keep everything as simple as possible. Here is the complete code:

#include <Servo.h>

Servo myservo;
int potPin = 2; // select the input pin for the potentiometer
int val = 86;   // variable to store the value coming from the sensor
int outval = 86;
boolean pushedfront = false;
boolean pushedrear = false;
int lastval = 86;

void setup() {
 myservo.attach(9);
}

void loop() {
 val = analogRead(potPin); // read the value from the sensor
 val = map(val, 0, 1023, -80, 279);

 outval = val;
 if(val<70&&val>35)
 outval-=4;
 else if(val>120)
 outval+=3;

 if(val>136){
 outval=136;
 }
 else if(val<26){
 outval=26;
 }
 myservo.write(outval);

 if(outval>110 && pushedfront==false){
 myservo.write(140);
 delay(200);
 pushedfront=true;
 }
 else if(outval<70 && pushedrear==false){
 myservo.write(35);
 delay(200);
 pushedrear=true;
 }

 if(outval+lastval>=220){
 pushedrear=false;
 }
 else if(outval==50){
 pushedfront=false;
 }

 lastval=outval;
}

Please note that this toy is not yet finished. So maybe I have to make change of this code some time in the future.

LinuxMint LMDE2 64bit update kernel 4.8.8

Here is a very easy way to update kernel for LinuxMint 64 bit. I found the instruction here: https://mintguide.org/system/639-install-linux-kernel-4-7-stable-on-linux-mint.html
Basically what I did was following:

      1. Download linux-image and linux-headers:
$ mkdir temp
$ cd temp
$ wget http://kernel.ubuntu.com/~kernel-ppa/mainline/v4.8.8/linux-headers-4.8.8-040808_4.8.8-040808.201611150231_all.deb
$ wget http://kernel.ubuntu.com/~kernel-ppa/mainline/v4.8.8/linux-headers-4.8.8-040808-generic_4.8.8-040808.201611150231_amd64.deb
$ wget http://kernel.ubuntu.com/~kernel-ppa/mainline/v4.8.8/linux-image-4.8.8-040808-generic_4.8.8-040808.201611150231_amd64.deb
      2. Install all .deb files:
$ sudo dpkg -i *.deb
      3. Update GRUB:
$ sudo update-grub
      4. Reboot:
$ sudo reboot
      5. Check the kernel version:
$ uname -r
    That’s it!