Linux Mint 13: LTSP, Guest Account and Epoptes Installation

Here is how I installed and configured LTSP on Linux Mint 13 32-bit. My LTSP server has two network cards, eth0 connected to internet through a router and eth1 for ltsp clients.

1. Install package “ltsp-server-standalone” using apt-get:

sudo apt-get install ltsp-server-standalone
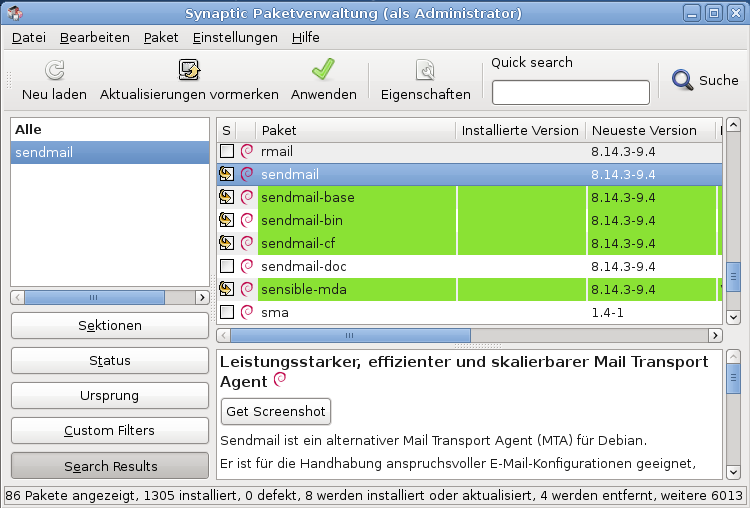
or synaptic:

mint_ltsp_1

2. From console (terminal) execute following commands:

sudo cp -R /usr/share/ltsp/plugins/ltsp-build-client/Ubuntu /usr/share/ltsp/plugins/ltsp-build-client/LinuxMint
sudo ln -s /usr/share/debootstrap/scripts/gutsy /usr/share/debootstrap/scripts/maya
sudo sed -i 's/DIST=${DIST:-"$(lsb_release -s -c)"}/DIST=${DIST:-"precise"}/' "/usr/share/ltsp/plugins/ltsp-build-client/LinuxMint/000-basic-configuration"
sudo ln -s /usr/share/ltsp/plugins/ltsp-build-client/Debian-functions /usr/share/ltsp/plugins/ltsp-build-client/LinuxMint-functions

3. Build ltsp client:

sudo ltsp-build-client --arch i386

4. Add following entry to “/etc/network/interfaces” file:

auto eth1
iface eth1 inet static
address 192.168.0.1
netmask 255.255.255.0

5. To make sure dhcp server only response to the second ethernet card, put interface “eth1” to file “/etc/default/isc-dhcp-server”:

INTERFACES="eth1"

6. At this point LTSP server is ready, you can try it by restarting the server and boot ltsp clients from network. But we want to go on setting up guest accounts. To activate guest account, create a new lts.conf file “/var/lib/tftpboot/ltsp/i386/lts.conf” and add following lines:

[Default]
LDM_GUESTLOGIN=True
LDM_PASSWORD=secret

7. Add guest user names:

sudo adduser ltsp20
sudo adduser ltsp21

8. Now you can try to login from ltsp client using guest account.

mint_ltsp_2

9. Now we want to automatically clean up guest home directory every time guest log in. Create a new file “/opt/ltsp/i386/usr/share/ldm/rc.d/S00-guest-sessions” and put following text in it:

case "$LDM_USERNAME" in
    ltsp*)
        ssh -S "$LDM_SOCKET" "$LDM_SERVER" 'cd; rm -rf .* *; rsync -a /etc/skel/ .'
        ;;
esac

10. Save the file and run “ltsp-update-image”:

sudo ltsp-update-image

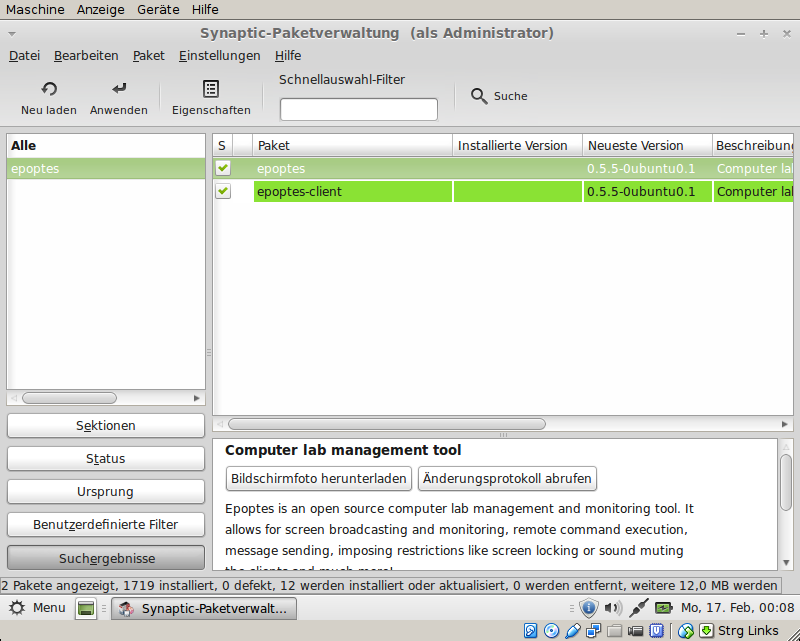
11. Install “epoptes” using apt-get:

sudo apt-get install epoptes

or synaptic:

mint_ltsp_3

12. Add user to group epoptes:

sudo gpasswd -a <username> epoptes

13. Install epoptes-client to ltsp client:

sudo chroot /opt/ltsp/i386
apt-get install epoptes-client
epoptes-client -c
exit

14. Update ltsp image:

sudo ltsp-update-image

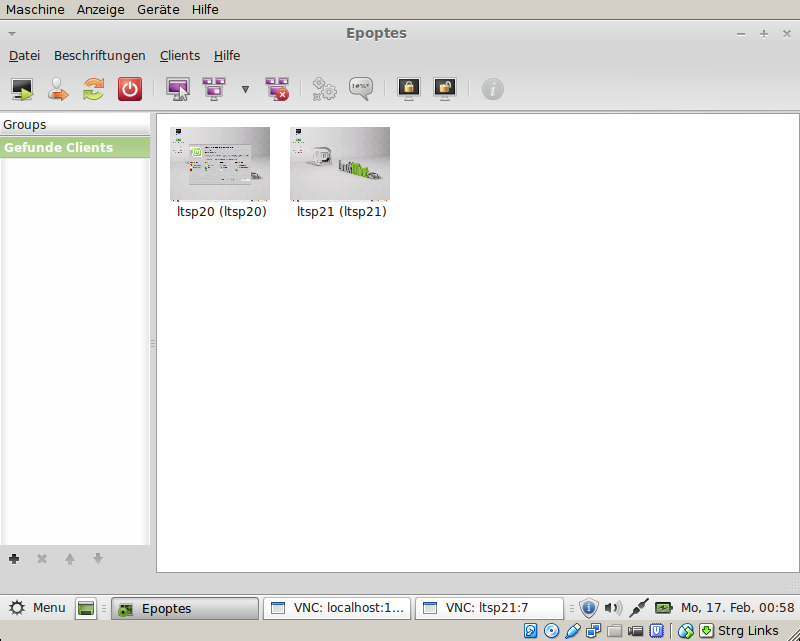
15. Reboot the server, start clients and run epoptes.

mint_ltsp_4

16. Fix for Mate desktop manager. Save following script as “endsession”:

#!/bin/sh
###########################################################################
# Requests a logout, reboot or shutdown.
# Currently it supports Gnome, KDE, XFCE and LXDE.
# Usage: endsession --logout|--reboot|--shutdown
#
# Copyright (C) 2011 Alkis Georgopoulos <alkisg@gmail.com>
#
# This program is free software: you can redistribute it and/or modify
# it under the terms of the GNU General Public License as published by
# the Free Software Foundation, either version 3 of the License, or
# (at your option) any later version.
#
# This program is distributed in the hope that it will be useful,
# but WITHOUT ANY WARRANTY; without even the implied warranty of
# MERCHANTABILITY or FITNESS FOR A PARTICULAR PURPOSE.  See the
# GNU General Public License for more details.
#
# You should have received a copy of the GNU General Public License
# along with this program.  If not, see <http://www.gnu.org/licenses/>.
#
# On Debian GNU/Linux systems, the complete text of the GNU General
# Public License can be found in `/usr/share/common-licenses/GPL'.
###########################################################################
die() {
echo "$@" >&2
exit 1
}
is_root() {
test $(id -u) -eq 0
}
is_ltsp() {
test -n "$LTSP_CLIENT"
}
do_logout() {
# Reset the xprop in case the user asks for a reboot, cancels it
# (e.g. unsaved work), and then he asks for a logout instead.
if [ $action = "logout" ] && is_ltsp; then
# LTSP_LOGOUT_ACTION might not exist, but we don't care
xprop -root -remove LTSP_LOGOUT_ACTION 2>/dev/null
fi
# Gnome
dbus-send --session --type=method_call --print-reply --reply-timeout=2000 \
--dest=org.gnome.SessionManager /org/gnome/SessionManager \
org.gnome.SessionManager.Logout uint32:1 2>&1 && return
# KDE
dbus-send --session --type=method_call --print-reply --reply-timeout=2000 \
--dest=org.kde.ksmserver /KSMServer org.kde.KSMServerInterface.logout \
int32:0 int32:0 int32:0 2>&1 && return
# Mate
dbus-send --session --type=method_call --print-reply --reply-timeout=2000 \
--dest=org.mate.SessionManager /org/mate/SessionManager \
org.mate.SessionManager.Logout uint32:1 2>&1 && return
# XFCE
xfce4-session-logout --logout 2>&1 && return
# LXDE
test -n "$_LXSESSION_PID" && kill "$_LXSESSION_PID" && return
die "I don't know how to logout in this environment"
}
do_reboot() {
if is_root; then
reboot && return
elif is_ltsp; then
# Notify ldm that we want to reboot after logoff
xprop -root -f LTSP_LOGOUT_ACTION 8s -set LTSP_LOGOUT_ACTION REBOOT
do_logout && return
fi
# Gnome
dbus-send --session --type=method_call --print-reply --reply-timeout=2000 \
--dest=org.gnome.SessionManager /org/gnome/SessionManager \
org.gnome.SessionManager.RequestReboot 2>&1 && return
# KDE
dbus-send --session --type=method_call --print-reply --reply-timeout=2000 \
--dest=org.kde.ksmserver /KSMServer org.kde.KSMServerInterface.logout \
int32:0 int32:1 int32:0 2>&1 && return
# Mate
dbus-send --session --type=method_call --print-reply --reply-timeout=2000 \
--dest=org.mate.SessionManager /org/mate/SessionManager \
org.mate.SessionManager.RequestReboot 2>&1 && return
# XFCE and LXDE 
dbus-send --session --type=method_call --print-reply --reply-timeout=2000 \
--dest=org.freedesktop.PowerManagement /org/freedesktop/PowerManagement \
org.freedesktop.PowerManagement.Reboot 2>&1 && return
# ConsoleKit is the last resort since it doesn't allow inhibiting
dbus-send --system --type=method_call --print-reply --reply-timeout=2000 \
--dest=org.freedesktop.ConsoleKit /org/freedesktop/ConsoleKit/Manager \
org.freedesktop.ConsoleKit.Manager.Restart 2>&1 && return
die "I don't know how to reboot in this environment"
}
do_shutdown() {
if is_root; then
poweroff && return
elif is_ltsp; then
# Notify ldm that we want to poweroff after logoff
xprop -root -f LTSP_LOGOUT_ACTION 8s -set LTSP_LOGOUT_ACTION HALT
do_logout && return
fi
# Gnome
dbus-send --session --type=method_call --print-reply --reply-timeout=2000 \
--dest=org.gnome.SessionManager /org/gnome/SessionManager \
org.gnome.SessionManager.RequestShutdown 2>&1 && return
# KDE
dbus-send --session --type=method_call --print-reply --reply-timeout=2000 \
--dest=org.kde.ksmserver /KSMServer org.kde.KSMServerInterface.logout \
int32:0 int32:2 int32:0 2>&1 && return
# Mate
dbus-send --session --type=method_call --print-reply --reply-timeout=2000 \
--dest=org.mate.SessionManager /org/mate/SessionManager \
org.mate.SessionManager.RequestShutdown 2>&1 && return
# XFCE and LXDE 
dbus-send --session --type=method_call --print-reply --reply-timeout=2000 \
--dest=org.freedesktop.PowerManagement /org/freedesktop/PowerManagement \
org.freedesktop.PowerManagement.Shutdown && return
# ConsoleKit is the last resort since it doesn't allow inhibiting
dbus-send --system --type=method_call --print-reply --reply-timeout=2000 \
--dest=org.freedesktop.ConsoleKit /org/freedesktop/ConsoleKit/Manager \
org.freedesktop.ConsoleKit.Manager.Stop 2>&1 && return
die "I don't know how to shutdown in this environment"
}
# main
# Hide all dbus output unless DEBUG is set.
test -z "$DEBUG" && exec >/dev/null
case "$1" in
-l|--logout)
action=logout
;;
-r|--reboot)
action=reboot
;;
-s|--shutdown)
action=shutdown
;;
*)
die "Usage: endsession --logout|--reboot|--shutdown"
;;
esac
do_$action

17. Copy file “endsession” into directories “/usr/share/epoptes-client” and “/opt/ltsp/i386/usr/share/epoptes-client”:

sudo cp endsession /usr/share/epoptes-client
sudo cp endsession /opt/ltsp/i386/usr/share/epoptes-client

18. Update ltsp image:

sudo ltsp-update-image

19. As I want to use this server for demonstration purpose, I want to clear up dhcp lease every time the server boots. To do that just add these two lines into file “/etc/rc.local” above line “exit 0”:

rm /var/lib/dhcp/*
service isc-dhcp-server restart

20. That’s it. Enjoy your new LTSP system!


Debian: swap hardware name eth0 to eth1 and vice versa

On one of my computer I have two network cards, one for internet connection and the other one for local network. After a new Debian installation, the hardware names changed. Here is what I have done to swap them back:

1. Edit file “/etc/udev/rules.d/70-persistent-net.rules” using your favorite editor:

$ sudo nano /etc/udev/rules.d/70-persistent-net.rules

2. Change entry NAME=”eth0″ to NAME=”eth1″ and NAME=”eth1″ to NAME=”eth0″. My file then looks like this:

# This file was automatically generated by the /lib/udev/write_net_rules
# program, run by the persistent-net-generator.rules rules file.
#
# You can modify it, as long as you keep each rule on a single
# line, and change only the value of the NAME= key.
# PCI device 0x14e4:0x1677 (tg3)
SUBSYSTEM=="net", ACTION=="add", DRIVERS=="?*", ATTR{address}=="00:30:05:c5:73:e0", ATTR{dev_id}=="0x0", ATTR{type}=="1", KERNEL=="eth*", NAME="eth0"
# PCI device 0x10ec:0x8169 (r8169)
SUBSYSTEM=="net", ACTION=="add", DRIVERS=="?*", ATTR{address}=="00:e0:52:ae:b2:95", ATTR{dev_id}=="0x0", ATTR{type}=="1", KERNEL=="eth*", NAME="eth1"

3. Edit file “/etc/network/interfaces” and change all “eth1” to “eth0”. My file then looks like this:

# This file describes the network interfaces available on your system
# and how to activate them. For more information, see interfaces(5).
# The loopback network interface
auto lo
iface lo inet loopback
# The primary network interface
allow-hotplug eth0
iface eth0 inet dhcp

4. Reboot your computer.

5. That’s it!

An easy way to install real Firefox on Debian

After couple of times installing Firefox on Debian the hard way by compiling it from source code, I found a very easy way to install it. Here is the page I’m talking about and this is what I have done:

1. Remove IceWeasel if it’s installed:

$ sudo apt-get remove iceweasel

2. Add the following line into “/etc/apt/source.list” file:

deb http://packages.linuxmint.com debian import

3. Add PGP-key:

$ sudo gpg --keyserver pgp.mit.edu --recv-keys 3EE67F3D0FF405B2
$ sudo gpg --export 3EE67F3D0FF405B2 > 3EE67F3D0FF405B2.gpg
$ sudo apt-key add ./3EE67F3D0FF405B2.gpg
$ sudo rm ./3EE67F3D0FF405B2.gpg
4. Update apt:
$ sudo apt-get update
5. Install Firefox and its language pack:
$ sudo apt-get install firefox firefox-l10n-de
6. Enjoy!

Easy Debian DVD

If you think you can play dvd on plain Debian just by inserting dvd in the tray, you are wrong. But fortunately we can install needed library easily. I did the steps described on this page.

1. Add these two line into “/etc/apt/source.list”.

deb http://download.videolan.org/pub/debian/stable/ /
deb-src http://download.videolan.org/pub/debian/stable/ /

2. Add apt-key for this repository by doing this:

wget -O - http://download.videolan.org/pub/debian/videolan-apt.asc|sudo apt-key add -

3. Update the apt.

sudo apt-get update

4. Install libdvdcss2.

sudo apt-get install libdvdcss2

5. That’s it! Now you can play dvd with your favorite video player.

Tiny Core Linux: nfs-client Setup

I think for some people the nfs-client setup on Tiny Core Linux is pretty easy and straightforward. But it took me couple of days to figure it out. So here I will document this mainly for myself.

1. Install nfs-utils (make sure it is loaded on boot):

tclnfs_012. This is very important step! By making nfs-utils to load on boot doesn’t mean that nfs-client service will be started on boot. To start it on boot we have to add “/usr/local/etc/init.d/nfs-client start” into file “/opt/bootlocal.sh”:

~$ sudo echo "/usr/local/etc/init.d/nfs-client start" >> "/opt/bootlocal.sh"

3. Create a script file in folder “.X.d” to mount the nfs folder:

~$ vi .X.d/nfsmount

4. Put following lines into that file:

#! /bin/sh
sudo mount <your.nfs.server.ip>:/<nfs/folder/path> /home/tc/<mount/directory>

5. Reboot computer and the nfs folder should be mounted automatically on boot.

6. Enjoy!


Debian Squeeze: Configuring Sendmail to relay through your Provider’s SMTP

If you have a home server and you need a functionality of sending an email from that server like for example: you forgot your password of a php website and you want to request an access (a new password) using an external email address. This task is almost impossible if you have a server without dedicated IP address, is also useful to have the right design for your website using services from sites as https://the-indexer.com/web-design-companies/. In this example I have a Faxserver on my home server and I want to set a new password. But if I click on “Forgot your Password?”, put my email address in and click send. Checked my email and nothing happened.

avantfaxThe reason for that is the remote mailserver will reject any email from my home server.

After some reading (from this link) and trial I managed to make it working to relay sendmail through my provider’s SMTP server. Here’s how I did it:

1. From Synaptic, install “sendmail-bin” and “sendmail” (if they are not already installed):

sendmail_012. Using your favorite editor put the following line into “/etc/mail/auth/client-info”:

AuthInfo:<your-smtp-server> "U:root" "I:<your-email-address>@<your-provider>" "P:<your-password>"

3. Create database hash from that file:

cd /etc/mail/auth
sudo makemap -r hash client-info.db < client-info

4. Change file permission of both files to 600:

sudo chmod 600 *

5. Change “/etc/mail/auth” directory permission to 700:

cd ..
sudo chmod 700 auth

6. Add following text to the end of file “/etc/mail/sendmail.mc”:

define(`SMART_HOST',`<your-smtp-server>')dnl
define(`confAUTH_MECHANISMS', `EXTERNAL GSSAPI DIGEST-MD5 CRAM-MD5 LOGIN PLAIN')dnl
FEATURE(`authinfo',`hash /etc/mail/auth/client-info')dnl
define(`CERT_DIR', `MAIL_SETTINGS_DIR`'certs')
define(`confCACERT_PATH', `CERT_DIR')
define(`confCACERT', `CERT_DIR/CAcert.pem')
define(`confSERVER_CERT', `CERT_DIR/mycert.pem')
define(`confSERVER_KEY', `CERT_DIR/mykey.pem')
define(`confCLIENT_CERT', `CERT_DIR/mycert.pem')
define(`confCLIENT_KEY', `CERT_DIR/mykey.pem')

7. Create certificate directory:

sudo mkdir /etc/mail/certs
cd /etc/mail/certs

8. Create SSL certificate:

sudo openssl dsaparam 1024 -out dsa1024 -out dsa1024.pem
sudo openssl req -x509 -nodes -days 3650 -newkey dsa:dsa1024.pem -out /etc/mail/certs/mycert.pem -keyout /etc/mail/certs/mykey.pem
sudo ln -s /etc/mail/certs/mycert.pem /etc/mail/certs/CAcert.pem
sudo openssl req -x509 -new -days 3650 -key /etc/mail/certs/mykey.pem -out /etc/mail/certs/mycert.pem

9. Change file permission of all files to 600:

sudo chmod 600 *

10. Change “/etc/mail/certs” directory to 700:

cd ..
sudo chmod 700 certs

11. Run “make”:

sudo make

12. Reload “sendmail”:

sudo /etc/init.d/sendmail reload

13. That’s it!

Fluxbox menu: open two programs at once

Sometimes we need to open always two programs at once. For example I always need to open “navit” and restart “gpsd” at the same time in order to make navit receives gps signal from gps-bluetooth-dongle (if gps dongle is turned on at a later time).

Fortunately this can be easily done in fluxbox. Just modify the existing navit menu line in “~/.fluxbox/menu” from:

[exec] (navit) {/usr/bin/navit} </usr/share/pixmaps/navit.xpm>

to:

[exec] (navit) {/usr/bin/navit & sudo /etc/init.d/gpsd restart} </usr/share/pixmaps/navit.xpm>

By using ampersand (&) you can add another command to start different program.

That’s it!

Reset user password on Debian Squeeze

Sometimes as an IT Administrator you are requested to reset a user password. Here is how I did it:

1.  Boot grub and choose recovery mode and do not press enter.

resetpwd_012. Press “e” key, go to the end of line “linux /boot/vmlinuz-…” and add a space (press spacebar once) and type “init=/bin/bash” and press “Ctrl-x” to boot.

resetpwd_023. After finished booting, type “mount -rw -o remount /” and press enter.

resetpwd_034. Type “passwd <username>” and press enter. Replace <username> with the real username whose his/her password needs to be resetted.

resetpwd_045. Type in a new password and press enter.

6. Type in the same password for confirmation and press enter.

7. Type “reboot”.

8. That’s it!

Capacitive battery charger

Disclaimer: Electricity is dangerous. High voltage and high current can kill you! Do not try to build this circuitry if you don’t have enough knowledge in electricity. If you still want to build this circuit, do it at your own risk! I don’t take any responsibility of what you do and its consequence. This article is intended for informational purpose only.

capcharger01

Not long ago I built a battery charger that uses capacitor as current limiter and voltage devider. Despite of simple schematic, this circuit has very good performance. It charged my 6 Volt 235AH dead battery from ~1 Volt to over 6 Volt within 15 minutes! But the charging process is kind of scary because of the (hydrogen and oxygen) bubbles crackling sound created during the process. Do not charge a battery in a closed (non-ventilated) room. Do it outside your house.

capcharger02

Here is the picture with the box opened:

capcharger03

Here is a picture of my test circuit:

capcharger04Here is the capacitor that I use (AC capacitor must be used):

capcharger05This is my schematic:

capcharger_scm_cutThe function of the switch is to change the total capacitance value of capacitor. The higher the capacitance value, the higher the charging current, which also means faster charging rate but with more heat generation.

And here is my explanation of how this circuit works:

capcharger_expl01_scm_cutcapcharger_expl02_scm_cutAnd here is the simplified explanation:

capcharger_expl03_scm_cut

Setting ntpclient on Tiny Core Linux

Sometimes it is annoying to have unsynchronized clock on the system, especially if your mainboard is old and the BIOS battery don’t hold the charge very long. Fortunately there is a program to automatically synchronize the system time on Tiny Core Linux. Here is how I installed and configured it:

1. Install ntpclient on boot:

ntpclient01

2. With your favourite editor, create a script file called “ntpclient_startup” on directory “~/.X.d”:

ntpclient02

3. Save it and make it executable.

4. Restart your system.

5. That’s it!